It was a crisp spring afternoon when I first decided to try my hand at pistachio macarons. The kitchen smelled of toasted nuts and vanilla, and the sunlight filtered through the lace curtains, turning the countertops into a warm stage for what felt like a culinary performance. I remember the first time I lifted the lid off the oven, a gentle puff of fragrant steam rose, carrying the sweet, buttery aroma of almond and pistachio that made my mouth water before the cookies even touched the plate. The moment was magical, and it reminded me why I fell in love with baking: the way simple ingredients can transform into something that feels both elegant and comforting at the same time.
What makes pistachio macarons stand out from the crowd is the delicate balance between the crisp, airy shell and the luxuriously smooth buttercream that hides inside. The subtle earthiness of pistachios pairs perfectly with the bright green hue, creating a visual treat that’s as pleasing to the eyes as it is to the palate. Have you ever wondered why the macarons at that fancy patisserie always seem to melt in your mouth? The secret lies in the meticulous technique, the quality of the ingredients, and a few little tricks that most home cooks overlook. I’m about to spill those secrets, and trust me, you’ll want to keep reading.
But wait—before you rush to preheat the oven, there’s a tiny detail that can make or break your batch. I once skipped a step that seemed insignificant, only to end up with flat, cracked shells that looked more like sad cookies than elegant French pastries. The good news? That mistake taught me a lesson that will save you hours of frustration, and I’m going to share it in step four of the instructions. Imagine the satisfaction of pulling a tray of perfectly risen, glossy macarons out of the oven, each one a tiny work of art.
Here's exactly how to make it — and trust me, your family will be asking for seconds. From selecting the finest pistachios to mastering the perfect macaronage technique, I’ve broken down every detail so you can feel confident, even if you’ve never attempted a macaron before. The journey from raw batter to a beautiful plate of pistachio macarons is a story worth telling, and I’m thrilled to guide you through each chapter. Ready to dive in? Let’s get started.
🌟 Why This Recipe Works
- Flavor Depth: The combination of toasted pistachios and vanilla-infused buttercream creates a layered taste that evolves with each bite, delivering a nutty richness followed by a silky sweetness.
- Texture Harmony: The outer shell boasts a crisp, slightly chewy crust while the interior remains tender and airy, offering a delightful contrast that keeps you reaching for another.
- Ease of Execution: While macarons have a reputation for being finicky, this recipe simplifies the process with clear steps and a few pro tips that demystify the most challenging parts.
- Time Efficiency: From mixing to baking, you’ll spend less than an hour in the kitchen, making it feasible even on a busy weekday evening.
- Versatility: The base recipe serves as a canvas for endless variations—think lemon zest, dark chocolate, or even a hint of rose water for a floral twist.
- Nutrition Boost: Pistachios bring healthy fats, protein, and antioxidants, turning an indulgent treat into a slightly more wholesome dessert option.
- Ingredient Quality: By using finely ground almond flour and premium unsalted pistachios, you ensure a smooth batter that yields flawless shells every time.
- Crowd‑Pleasing Factor: The vibrant green color and elegant presentation make these macarons perfect for celebrations, gifting, or simply impressing guests at a dinner party.
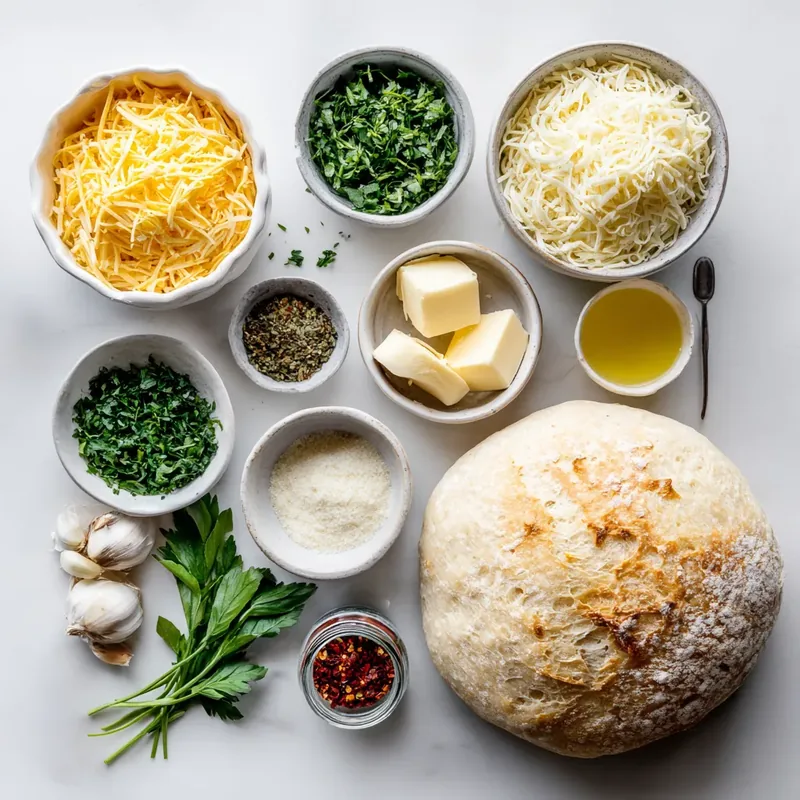
🥗 Ingredients Breakdown
The Foundation: Flour & Sugar
The base of every macaron is a delicate blend of powdered sugar and almond flour. Powdered sugar provides the fine texture needed for a smooth shell, while almond flour contributes the nutty flavor and structure. Using a high‑quality, blanched almond flour ensures a light, airy crumb without any bitter aftertaste. If you can’t find almond flour, you can grind blanched almonds in a food processor, but be careful not to over‑process into almond butter. The secret to a flawless shell lies in the double‑sifting process, which eliminates any gritty particles that could cause cracks.
Aromatics & Spices: Vanilla & Food Coloring
Vanilla extract adds a warm, aromatic backbone that balances the earthy pistachio flavor. I prefer pure vanilla extract because it delivers a cleaner taste than imitation. The green food coloring is purely for visual drama; a few drops are enough to achieve that pastel hue without overpowering the natural pistachio color. If you’re aiming for a more natural approach, you can substitute a splash of matcha powder, which adds a subtle bitterness that pairs beautifully with the sweet buttercream.
The Secret Weapons: Pistachios & Cream of Tartar
Unsalted pistachios are the star of this recipe, providing both flavor and a beautiful speckled appearance in the buttercream. Toast them lightly before grinding to unlock deeper aromas—just a minute or two in a dry skillet will do. Cream of tartar stabilizes the egg whites, giving them volume and a glossy finish that translates into a smooth, glossy macaron surface. Without it, you might end up with flat, dense shells that lack that signature “pied” look.
Finishing Touches: Butter & Additional Sugar
The buttercream filling is where the magic really happens. Unsalted butter creates a rich, creamy base that carries the pistachio flavor without adding any unwanted saltiness. Granulated sugar dissolves into the butter, creating a silky texture that spreads effortlessly between the shells. Adding finely chopped pistachios to the buttercream provides a delightful crunch that contrasts with the soft interior, turning each bite into a textural adventure.
With your ingredients prepped and ready, let's get cooking. Here's where the fun really begins…

🍳 Step-by-Step Instructions
-
Begin by preheating your oven to 300°F (150°C) and line two baking sheets with parchment paper or silicone mats. While the oven warms, toast the unsalted pistachios in a dry skillet over medium heat for about 2‑3 minutes, stirring constantly until they turn a light golden hue and release a nutty perfume. Once toasted, let them cool completely before grinding them into a fine powder using a food processor; this will become part of your buttercream later. The aroma at this stage is already a promise of the deliciousness to come, and you’ll notice a subtle change in the kitchen’s atmosphere as the pistachios release their oils.
💡 Pro Tip: Spread the pistachios on a single layer while toasting; overcrowding leads to uneven browning and a bitter taste. -
In a large mixing bowl, combine 1 cup powdered sugar, ½ cup almond flour, and the ¼ cup of toasted pistachios (reserve a tablespoon for garnish). Sift this mixture twice through a fine mesh sieve to ensure a smooth, lump‑free base. The double sift removes any remaining grit and creates a fine, velvety powder that will later give your shells that coveted glossy finish. As you sift, you’ll hear a soft, whispery sound that signals the beginning of a perfect batter.
-
In a clean, dry bowl, whisk together 2 large egg whites and ¼ teaspoon cream of tartar until they become frothy. Then, gradually add ¼ cup granulated sugar while continuing to whisk on medium speed. Once the sugar dissolves, increase the mixer to high speed and whip the whites until they form stiff, glossy peaks that hold their shape—this usually takes about 3‑4 minutes. The peaks should be so firm that when you lift the whisk, the meringue stands tall without drooping, resembling soft snow caps on a winter mountain.
⚠️ Common Mistake: Over‑whipping the egg whites can cause the meringue to become grainy and dry, making it impossible to achieve a smooth macaron batter. -
Now comes the pivotal “macaronage” step: gently fold the dry ingredients into the meringue using a silicone spatula. Start by adding a third of the sifted mixture, then fold until the batter flows like lava—slow, steady movements are key. The batter should reach the “ribbon” stage, where it falls back onto the spatula in a smooth ribbon that slowly disappears back into the bowl. This is the moment where patience truly pays off; if you over‑mix, the batter becomes too runny and the shells will spread; under‑mix and they’ll be lumpy.
💡 Pro Tip: Test the consistency by lifting the spatula; the batter should form a thick ribbon that slowly folds back onto itself without breaking. -
Add a few drops of green food coloring (or matcha powder for a natural hue) and fold just until the color is evenly distributed. Be careful not to over‑mix at this stage; a few gentle strokes are enough to achieve that pastel green without compromising the batter’s texture. The color should be soft, reminiscent of a spring meadow, not neon. As the pigment spreads, you’ll notice a subtle shift in the batter’s sheen, hinting at the beautiful shells that are about to emerge.
-
Transfer the batter to a piping bag fitted with a ½‑inch plain round tip. Pipe uniform 1‑inch circles onto the prepared baking sheets, spacing them about an inch apart to allow for spreading. Once all the circles are piped, gently tap the trays against the counter three times to release any air bubbles that may have formed. This tapping step is crucial; it helps the batter settle and creates a smooth top surface that will develop the signature “feet” during baking.
-
Allow the piped shells to rest at room temperature for 30‑45 minutes, or until a thin skin forms on the surface. You’ll know they’re ready when you can lightly touch the tops without any batter sticking to your finger. This drying period is the secret behind that coveted glossy finish and the delicate “foot” that forms at the base of each macaron. If you’re in a humid environment, extend the resting time by an extra 10‑15 minutes.
💡 Pro Tip: Place the trays in a low‑heat oven (around 150°F) with the door slightly ajar to speed up the drying process on humid days. -
Bake the macarons in the preheated oven for 15‑18 minutes, rotating the trays halfway through to ensure even browning. The shells should be set, with a faintly crisp top that makes a gentle “tap” sound when you lightly press them. If you notice any cracks forming, reduce the temperature by 5°F next time; every oven behaves a little differently. When they’re done, remove the trays and let the macarons cool completely before attempting to remove them from the parchment.
-
While the shells cool, prepare the pistachio buttercream: beat ½ cup unsalted butter until light and fluffy, then gradually add 1 cup powdered sugar, ½ teaspoon vanilla extract, and the finely chopped pistachios. Continue beating until the mixture is smooth, glossy, and holds its shape. If the buttercream feels too thick, add a teaspoon of milk or a drizzle of pistachio oil to loosen it. Once ready, pipe a generous dollop onto the flat side of one shell and sandwich it with another shell, pressing gently to spread the filling to the edges.
🤔 Did You Know? Buttercream can be flavored with a pinch of sea salt to enhance the sweet‑nutty profile, creating a sophisticated sweet‑salty contrast.
And there you have it! But before you dig in, let me share some tips that will take this from great to absolutely unforgettable…
🔐 Expert Tips for Perfect Results
The Taste Test Trick
Before you pipe the final batch, taste a tiny piece of the buttercream. Adjust the sweetness or add a pinch more vanilla if it feels flat. This tiny tweak ensures that every macaron delivers a balanced flavor profile, and it’s a habit that even professional patissiers swear by. Trust me, that extra moment of tasting saves you from an under‑seasoned surprise later.
Why Resting Time Matters More Than You Think
The 30‑minute drying period is not just a formality; it’s the foundation of a smooth, glossy top. During this time, the outer layer forms a thin skin that prevents cracking and promotes the formation of the iconic “feet.” Skipping or shortening this step often results in flat shells that lack that delicate lift. The best part? You can use this waiting time to prep the buttercream, making the workflow seamless.
The Seasoning Secret Pros Won’t Tell You
A pinch of sea salt in the buttercream can elevate the nutty flavor, creating a subtle sweet‑salty dance on the palate. It’s a technique borrowed from gourmet chefs who love to balance richness with a whisper of salt. Add it sparingly—just enough to enhance, not overpower. The result? A more complex, layered taste that keeps your guests reaching for another.
Temperature Control Is Everything
If your kitchen is warm, the batter may spread too much; if it’s cold, the shells may not rise properly. I always keep a small fan on low to circulate air during the resting phase, which helps maintain a consistent environment. For those living in particularly humid climates, a dehumidifier can be a lifesaver, ensuring the shells dry evenly without becoming sticky.
The Art of the Perfect Pipe
When piping, hold the bag at a 90‑degree angle and apply steady pressure. This technique yields uniform circles that bake evenly. If you notice any uneven edges, smooth them with a wet fingertip before the shells set. The best part? Consistency in size leads to uniform “feet,” making your presentation look professionally plated.
🌈 Delicious Variations to Try
One of my favorite things about this recipe is how versatile it is. Here are some twists I've tried and loved:
Lemon‑Infused Pistachio
Add 1 tablespoon of freshly grated lemon zest to the buttercream and a splash of lemon juice to the shell batter. The citrus brightens the nutty flavor, creating a refreshing summer vibe. This variation pairs wonderfully with a glass of chilled Prosecco, making it an elegant brunch treat.
Dark Chocolate Drizzle
Melt 70% dark chocolate and drizzle it over the assembled macarons just before serving. The bittersweet chocolate adds depth and a luxurious finish, contrasting beautifully with the sweet pistachio filling. A tiny chocolate accent also adds visual drama, turning each bite into a mini celebration.
Rose Water Elegance
Replace half of the vanilla extract in the buttercream with rose water for a floral note that whispers of Parisian patisseries. The scent is subtle yet enchanting, and it pairs exquisitely with the earthy pistachio. Serve these at a garden party, and watch guests be transported to a fragrant oasis.
Matcha Green Tea Twist
Swap the green food coloring for 1 teaspoon of high‑quality matcha powder, and add a pinch of extra matcha to the buttercream. The earthy tea flavor complements the pistachios, creating a sophisticated East‑West fusion. This version is perfect for tea time, especially when paired with a steaming cup of jasmine tea.
Spiced Cardamom Delight
Incorporate ¼ teaspoon of ground cardamom into the shell batter and a tiny pinch into the buttercream. Cardamom’s warm, floral spice lifts the nutty profile, giving the macarons a hint of exotic intrigue. This variation shines during holiday gatherings, adding a subtle festive note without overwhelming the palate.
📦 Storage & Reheating Tips
Refrigerator Storage
Place the assembled macarons in an airtight container and store them in the refrigerator for up to 3 days. The cool environment allows the buttercream to set, intensifying the flavors as they meld together. Before serving, let them sit at room temperature for about 20‑30 minutes; this brings back that soft, melt‑in‑your‑mouth texture.
Freezing Instructions
If you’ve made a large batch, you can freeze the macarons in a single layer on a baking sheet, then transfer them to a zip‑top freezer bag. They’ll keep for up to 2 months. When you’re ready to enjoy them, move the bag to the refrigerator for a few hours, then bring the macarons to room temperature before serving. The trick to reheating without drying them out? A splash of pistachio oil brushed lightly over the shells before a quick 5‑minute bake at 250°F restores their sheen.
Reheating Methods
For a freshly warm experience, pop the macarons in a preheated oven at 300°F for just 3‑4 minutes. This gentle heat revives the buttery interior while keeping the shell crisp. Avoid microwaving, as it can make the shells rubbery and the buttercream melt unevenly.